3D Printing: An Introduction
by Caleb Flaim, Recess Media Mentor
I recall the first time I saw a 3D printer in the Chicago Museum of Art and Science when I was about 10 years old. My mom pointed it out to me while we walked through a maker space area, and I had no idea what it was, what it did, or whether to think it was fantastic. I had no context with which to consider that realm and therefore viewed what was, in hindsight, a ten thousand dollar printer, through a clouded lens. Little did I know that I would have my own 3D printer within two or three years, and within a few years of that, several more. My name is Caleb Flaim (he/him), and I am currently a rising sophomore at the University of Washington pursuing a dual degree in oceanography and environmental studies.
Now, I know what you may be thinking: “Why is a guy going to dolphin camp writing an article about 3D printers?” To answer this, I will share a bit about my background and experiences with 3D printing.
My first 3D Printer:
I first interacted with a 3D printer in my 7th-grade classroom. My teacher decided that having a 3D printer would be of great educational value. It was, and she wrote a grant for a Makerbot Replicator 2 — please do not ever buy one of these because you will spend more time fixing it or on hold with customer service than printing. The only catch was that she had convinced herself that it would break, quit working, experience an antimatter-matter annihilation, or go up in flames if she so much as looked at it. Her solution was to give me the user’s manual, which was sent ahead of the printer, and asked me to learn how to use the new tool. I read the booklet cover-to-cover several times and consumed an unhealthy amount of YouTube content about 3D printers. She had unknowingly set me up for a lifelong passion by encouraging me to learn how to use this machine.
After the printer arrived, successfully printed the test models, and quit working numerous times, I was hooked. Later that same year, I received a Da Vinci Jr. 1.0 as a holiday gift. This clear-tangerine and white printer was possibly the best present I had ever received. It sparked hours upon hours of creative modeling, research. It opened the door to a world of thinking in 3D that I had never experienced. I used this machine to print hundreds of items ranging from a simple cylinder to a tessellated pyramid to a thirty-something-piece octopus.
I learned the basics of 3D printing with this machine: how to use the software, what materials could be used, how the software works, how the printer works, the file types, and what to do when it broke. And break it did. I eventually used the printer so much, after about 1,000 hours of print time, that the brains of the printer died during my sophomore year of high school. This printer, in hindsight, was not the great of a machine: the software was limited, and the printer used a proprietary filament type that did not work all that well.
Over the next few years, I would get two more 3D printers, a Creality CR-10 and Ender 3 pro, and used them for everything from printing useless models to printing nearly a thousand face shields during the early days of the Covid-19 pandemic.
3D Printing 101:
Now that you know more about my experience with 3D printers, let’s get down to basics.
Three-dimensional (3D) printing is a method of additive manufacturing. It comes in two general desktop, consumer-friendly flavors: fusion deposition modeling (FDM) and vat polymerization/stereolithography (SLA). Don’t be frightened by these names; they are technical jargon used by people with engineering degrees.
Additive Manufacturing is a method through which objects are made by purely adding material. Rather than starting with a block of plastic and carving out a car or boat (this is subtractive manufacturing), you start with nothing and add material to create the desired object. This method of building is typically less wasteful than methods like computer numerical control (CNC) milling that cut away material to make an object rather than adding material.
FDM is the process of taking some type of material, typically plastic or metal, and fusing new material to material that is already there, often through the application of heat. An example of this that may be familiar to you is a hot glue gun:
Imagine laying a piece of parchment paper on a countertop after heating up a hot glue gun. Trace a medium-sized circle with the nozzle of your hot glue gun on the parchment paper while squeezing the handle. Now, trace a slightly smaller circle inside of the one you just drew, the edges just barely overlapping. As you do this, the new hot glue momentarily melts the first circle and bonds with it. Once the overlapping part has cooled, they are one piece. Next, imagine repeating this step until you have filled in the entire outer circle with hot glue. If you were to peel it off of the parchment paper, it would be a one-piece, solid circle.
Instead of peeling it off, let’s make your disc into a cylinder. Imagine squeezing a circle the same size as the first one you drew on top of the initial layer. This second layer has fused with the first circle. Let this cool a bit and repeat until a cylinder of your desired height is formed. When you peel the hot glue cylinder off of the parchment paper, it will be one piece and maybe even water-tight. This, in essence, is how FDM 3D printers work. They fuse new material to old material and repeat.

3D printers of this type lay repeated, thin layers, typically comprised of slightly varying shapes of molten plastic or metal on top of one another. The liquid material instantly melts part of the material beneath it, fuses with it, and solidifies the next instant. FDM printers can also use materials like ceramic, concrete, cookie dough, or blood cells. These types, however, do not rely on heating the materials, but just lay layers on top of one another as they harden. We will not discuss these, as they are much more niche.
FDM 3D printing is the most common type of 3D printing that is used today by consumers like you and me. The printers I have owned and worked with are of this type. It doesn’t require fancy or smelly chemicals like SLA printing, which we will get to quickly, and requires little equipment. The average run-of-the-mill 3D printer will melt plastic wire, called filament, to lay layers of plastic. When people say, “I saw a 3D printer,” odds are that this is the style they are describing. Because of this, for the rest of this article, when I say, “3D printer,” I am referring to FDM.
SLA printing is similar to FDM in that layers of new material are attached to older material. The most significant difference is in how these layers are made. SLA printers (resin 3D printers) use a material that starts out as a liquid and ends as a solid; FDM printers use a material that starts and ends as a solid. Resin printers use a photopolymer — engineer-speak for a liquid substance that hardens after exposure to light — and a laser. There are variations in how this works, but the general idea is that an upside-down platform sits on top of a resin vat. The laser then traces out the shape of each layer through the resin onto the platform. The material at the build plate, or previously hardened layer, hardens. Due to how the laser is focused, the light only cures the material directly at the build surface. This process is repeated until the object is made.
One other difference between FDM and resin printing is that resin printing also requires curing the prints after they are “finished.” Once a print is done on an FDM printer, it is ready to be used. With resin printing, however, the object must be put into a curing box where the print is bathed in UV light to finish hardening the printed material.
The curing process of photopolymer resins can be rather smelly and possibly toxic. The resins themselves tend to be very harmful in their liquid form — this is one reason I lean towards FDM printing.
Components of 3D Printing
There are four main components to 3D printing: the machine, the file(s), the software, and the material.
The machine is responsible for turning machine language into a physical, tangible, and unique object that will almost surely spark a conversation (See the double frog at right for an example). Without the machine, 3D printing would just be 3D . . . which is similar to an excellent restaurant with a menu, but no food. There are many shapes, sizes, and versions of 3D printers; some use plastic, some print houses, and some print human hearts. The underlying principle, however, is the same for all printer formats.

3D printing, as well as CNC mills or laser cutters, use what is called stepper motors to move in tiny, precise increments known as “steps.” When the motor is turned on for most electrical motors, it starts spinning as fast as the power supply will allow. Stepper motors are designed to rotate a specific amount for every pulse of electricity; instead of turning as far as that amount of electricity enables the motor, the motor spins a set number of steps. This allows for exact movements down to the single-digit-micron level. These motors are the reason 3D printers can do what they do.
Secondly, there is the 3D file of whatever object is being produced. This file can range in size, kilobytes to gigabytes, and shapes ranging from the Empire State Building to Daffy Duck to French horns. Two main file types are involved in the typical 3D printing process — there is technically a third, but this file type depends on what software the model is designed in and is ultimately exported to the first file type we will discuss. This first file type is a .stl file (dot “s” “t” “l” or STL). To better explain what this file type is, consider this exercise.
Imagine that you are holding a small wooden cube in your hand. Each corner of the cube is a vertice, a dot, or point; there are eight. Imagine that you draw a ninth dot in the center of the top face of the same cube. Connect it to each of the four corners by drawing lines that look like an “X” with one segment from the center to each corner. Pretend that you can pull up on the center dot with your other hand. When you do this, the middle point moves up, and the lines forming an “X” lengthen to stay attached to both the center and the corners. The top of the cube is no longer flat nor a square: it is a pyramid.
A cube only requires eight points and 12 edges to describe the 3D shape. The object you just created requires nine points and 16 edges. This is the essence of what an STL file is; a series of points connected by lines to form triangular geometries that describe the surface of a model.
Complex objects like an animal, a human face, or a modern car require thousands of points and lines to make up the model. This file type, as helpful as it is for digitally viewing and describing an object, is useless if you were to directly plug it into a 3D printer and click “print.” In fact, the file probably would not even show up on the printer’s screen. This is because the printer is a mechanical machine that is designed to follow exact instructions for making an object. Giving a 3D printer an STL file and telling it to print is like throwing a ball for a dog who has never been taught how to fetch. The only difference is that the dog can learn to play fetch, and a 3D printer cannot learn, at least at this point in time, how to print directly from an STL file. In order to print a model, there is an intermediate step that requires some software to turn the STL file into a .gcode file (dot “g” “code” or GCODE). We will discuss GCODE and the software at the same time since they are intertwined.
3D printers require software called a “slicer” to turn STL files in GCODE. One GCODE is a single command, G1 or M99, for example, that the brains of the printer can understand and translate to turning a motor or melting plastic. The name of this software is relatively self-explanatory — it slices a model into layers. Slicers are basically Apple or Google maps, but for a 3D printer. Instead of turning a series of roads into directions for a person to follow, they break down models into individual layers and write commands for the printer to follow for each layer. As we discussed earlier, printers make their objects by laying repeated layers of material, regardless of the printer type. The GCODE, in plain language, for the hot glue cylinder we made earlier may look like this:
- Heat up the hot glue gun
- Lower hot glue gun to parchment paper
- Squeeze handle while tracing a circle
- Move inward one nozzle width and repeat the above step
- Repeat step four until the circle is filled
- Move up 3 millimeters
- Repeat steps 1 through 6 until the cylinder reaches the specified height
- Move hot glue gun away from the object
- Cool off hot glue gun
This is precisely what a slicer does. It breaks a complex model stored in an STL file into thin layers — usually between .08 mm and .32 mm for the FDM and SLA printers — and then writes very detailed instructions for what the printer needs to do. GCODE files are often thousands of lines of commands long, and it would be nearly impossible to code a GCODE file that would produce something like a model of the Thinker by hand.

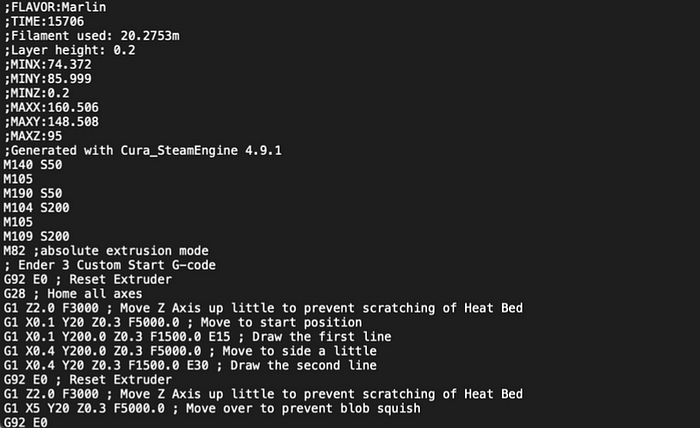
These three images all represent the same 3D tardigrade model. The top left (yellow) model is the STL version. The top right (red) model is the visual representation of the GCODE of the STL that has been sliced. The bottom image is what the first handful of lines of GCODE look like; the file is
actually several thousand lines long. The images show the transition from what we see to what the machine thinks.
The final fundamental component of 3D printing is the material that is used to make an object. FDM printers use a plastic filament that is pulled through the printer by a stepper motor and extruded out of a roughly 200°C nozzle. The most common type of filament used is PLA plastic. This type of plastic prints easily, has a high resolution, but is relatively brittle and not great for structural components. Another common material is ABS plastic — which is probably what your earbuds are made out of. ABS is a more robust plastic and is better for structural components, but is harder to print with. It typically requires a 3D printer with a heated build plate, the part of the printer where the object is formed, and a heated enclosure to keep the plastic from shrinking too much during the printing process.
Filament can also include materials like wood, carbon fiber, and even steel. These filaments are still plastic, but have shavings of the other material sprinkled into the filament when it is made: wood filament is just PLA plastic with sawdust in it. These can have added visual or structural benefits and are just fun to use in general.
The typical price range for getting into FDM 3D printing is around 200 USD and around 400 USD for SLA printing. If you are considering getting into 3D printing or have general questions about the topic, I highly recommend pursuing that path and learning more. 3D printing is an enjoyable and fulfilling hobby with real-world, practical applications that you will discover through your printing journey and learning process.
